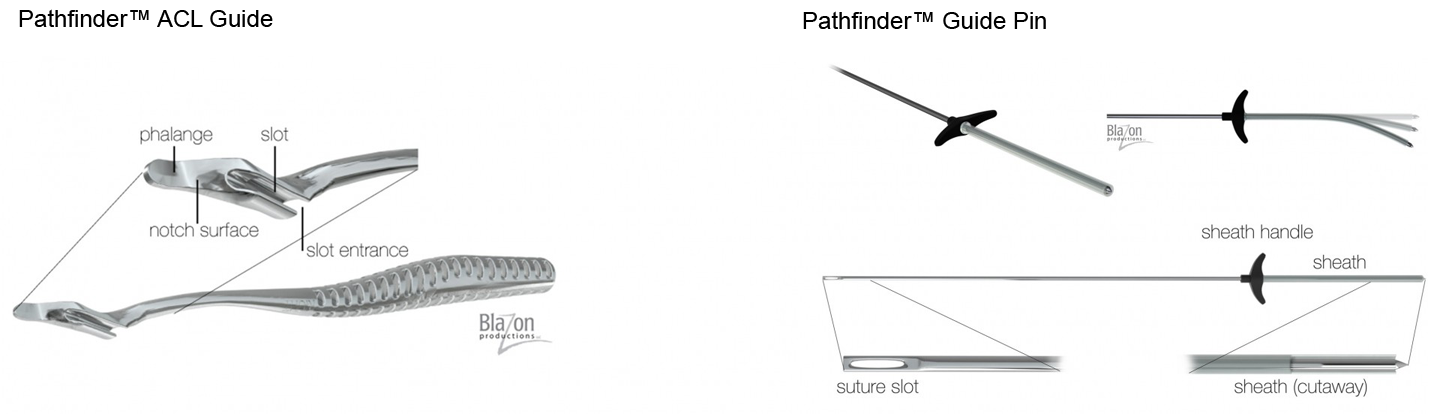
The Pathfinder™ ACL System enables the surgeon to achieve anatomic femoral tunnel positioning in a simple, reproducible way that preserves the technical ease of a traditional transtibial approach.
The Pathfinder ACL Guide is inserted through the standard medial portal to direct the flexible Pathfinder Guide Pin – inserted separately through the tibial tunnel - to the anatomic center of the femoral ACL footprint. Further, the transtibial path of the wire and the geometry of the Pathfinder Guide together create a trajectory for the Guide Pin that results in a long, minimally angulated and intact femoral tunnel.
The recommended technical sequence is outlined below, all steps performed with the knee remaining at 90 degrees of flexion:
Terminology
Summary of Pathfinder HTT Surgical Technique
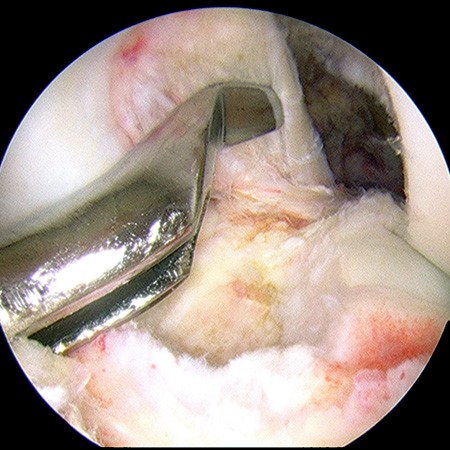
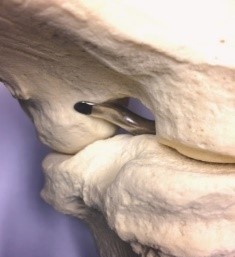
 18 year old female soccer player, left knee ACL reconstruction
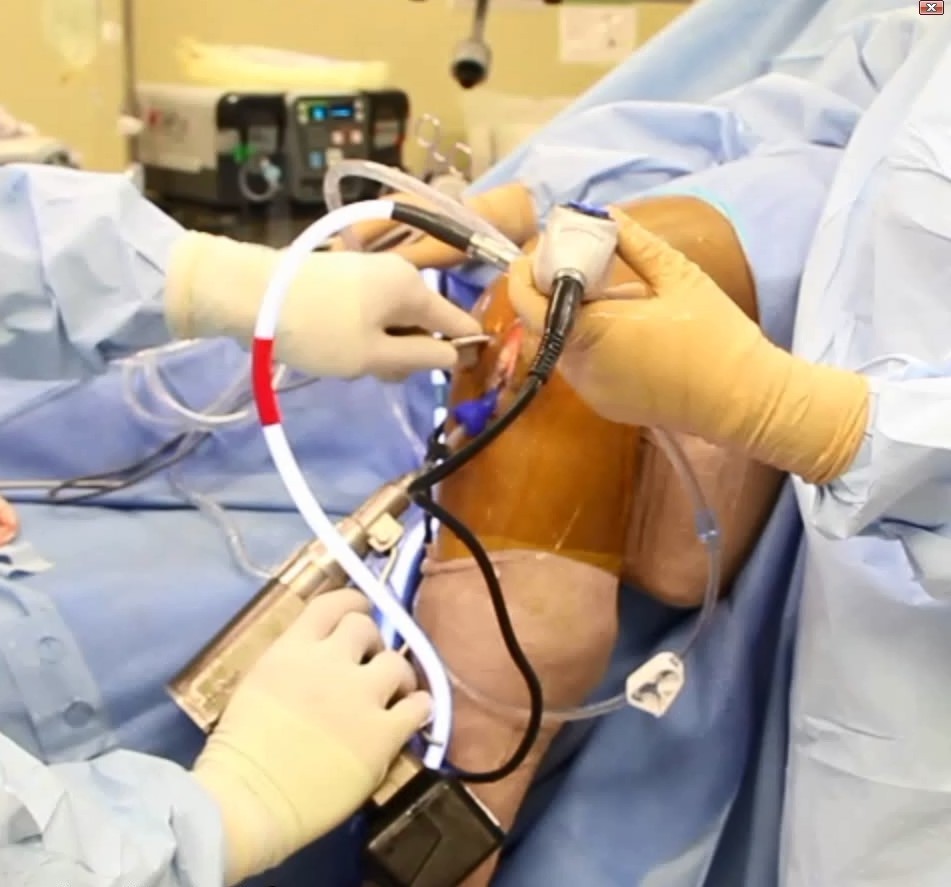
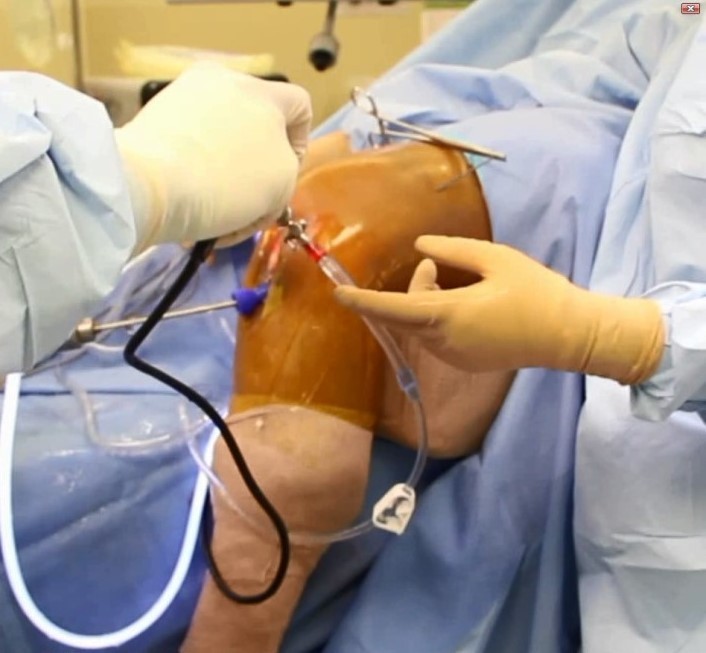
1. Insert the Pathfinder Guide.
- Insert the Pathfinder Guide through the standard medial portal. Confirm that the distal end of the Guide (phalange and notch surface) can fit snugly against the lateral condyle notch and posterior surfaces.
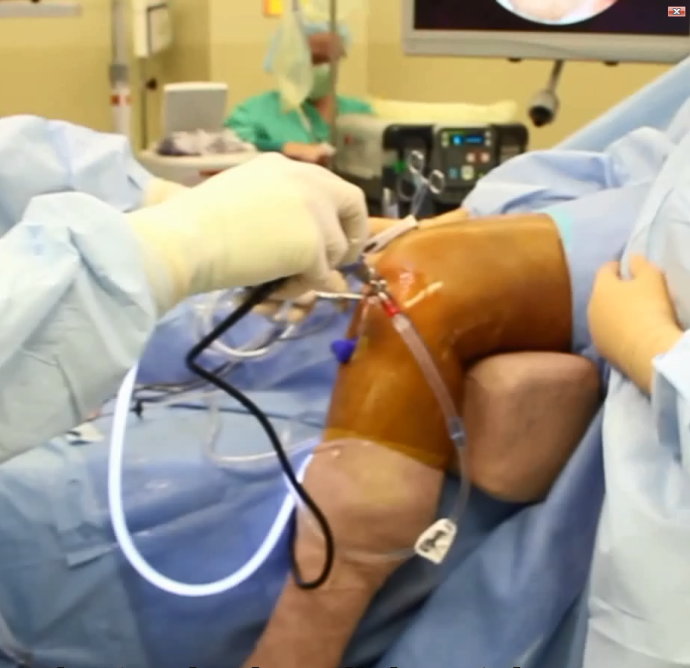
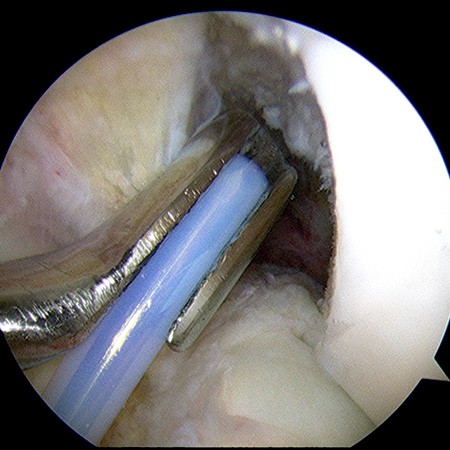
2. Insert the flexible Pathfinder Guide Pin with Sheath into the slot of the Pathfinder Guide
- Pull the Pathfinder Guide back until the entrance to the slot is on top of the tibial tunnel aperture. Holding the handle of the Sheath and the Pin together, insert drill Pin and Sheath into slot entrance.
- Still holding the Guide Pin and Sheath together, push both forward until the Sheath bottoms at the distal end of the slot in the Guide.
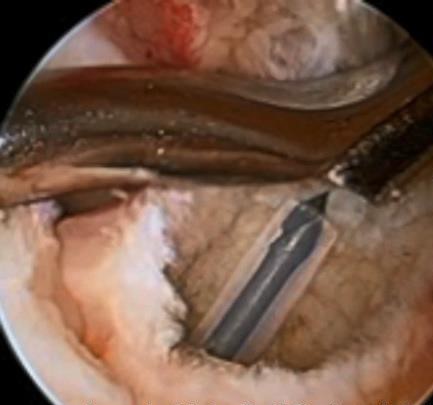
3. Position the Pathfinder Guide and Guide Pin together against the posterior lateral condyle.
- Advance both Pathfinder Guide and Pathfinder Guide Pin with Sheath through the notch and posterior to the lateral femoral condyle.
- The Guide is then translated anteriorly (pulled back) to engage the distal phalange flush to the posterior aspect of the lateral femoral condyle, with the notch surface of the Guide pushed snug against the notch surface of the condyle. This normally positions the drill point of the Guide Pin tip at the anatomic center of the femoral ACL footprint. The surgeon can easily reposition if desired. Push the wire forward 1-2 mm until you feel the tip touch the condyle.
- Note: For the majority of knees, the 7 mm offset Guide will position the drill tip of the Guide Pin directly in the center of the native femoral insertion. However, for particularly small or large patients, the smaller (5.5 mm) and larger (8 mm) offsets can be chosen to optimize pin position.

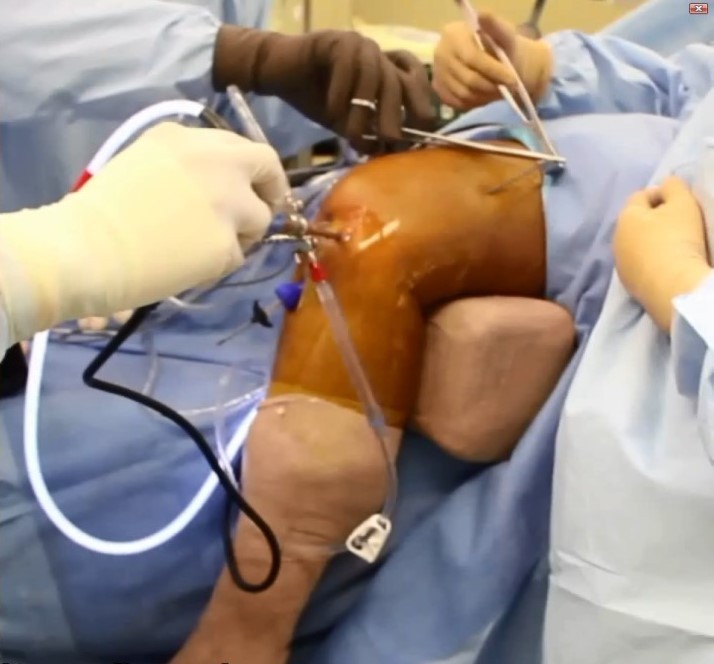
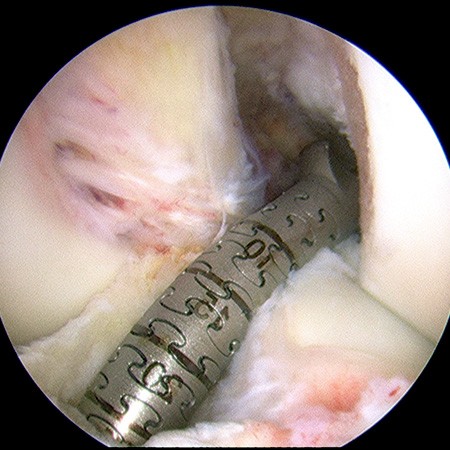
4. Drill the Flexible Guide Pin to exit mid-thigh.
- Holding the Pathfinder Guide and Guide Pin together and still against the LFC posterior and notch surfaces, grasp the Pathfinder Flexible Guide Pin with a cannulated drill.
-
Reconfirm that the drill tip of Guide Pin is still at the desired location (center of the ACL footprint), drill the Guide Pin through the femur to exit the lateral thigh.
- Note: The knee should remain at 90 degrees during drilling (no need to hyperflex or manipulate position).
-
As with any femoral tunnel drilling technique, a safe pin exit point in the anterior thigh should be confirmed to ensure posterior wall integrity after reaming.
5. Remove the Pathfinder Sheath and then the Pathfinder Guide.
-
After removing the drill, the Sheath is slid proximally off the Guide Pin by grasping the Sheath handle and pulling.
-
With the Sheath removed, the Pathfinder Guide can then be easily disengaged from the naked wire and pulled out of the medial portal.
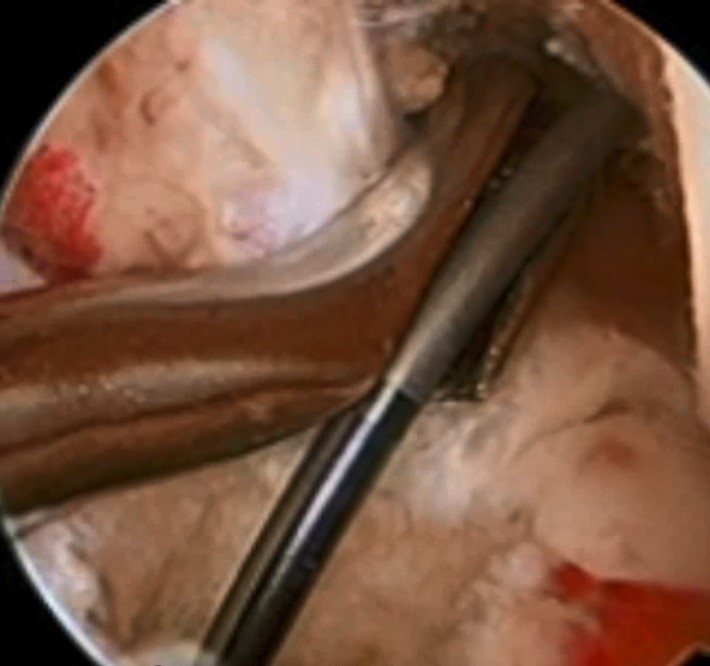
6. Ream the femoral tunnel with a flexible reamer.
- The procedure is now identical to a conventional transtibial technique, except that a flexible reamer is used instead of a rigid reamer. As with the Transtibial Technique, a long femoral tunnel is possible. The typical depth of 35-40mm is easily obtained with virtually no chance of blowout.
-
While not ideal, if a flexible reamer is not available, a rigid reamer* may be used antegrade over the wire along an outside-in path.
[*See Resources and References for a detailed Technique Guide]
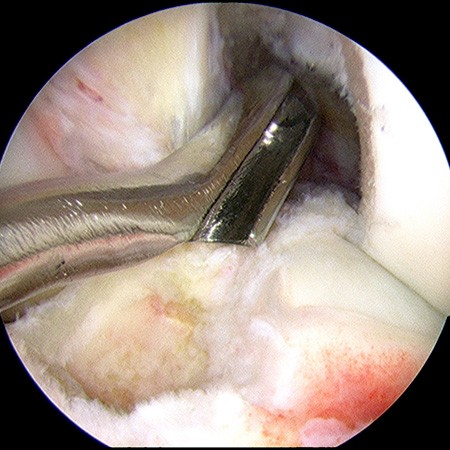
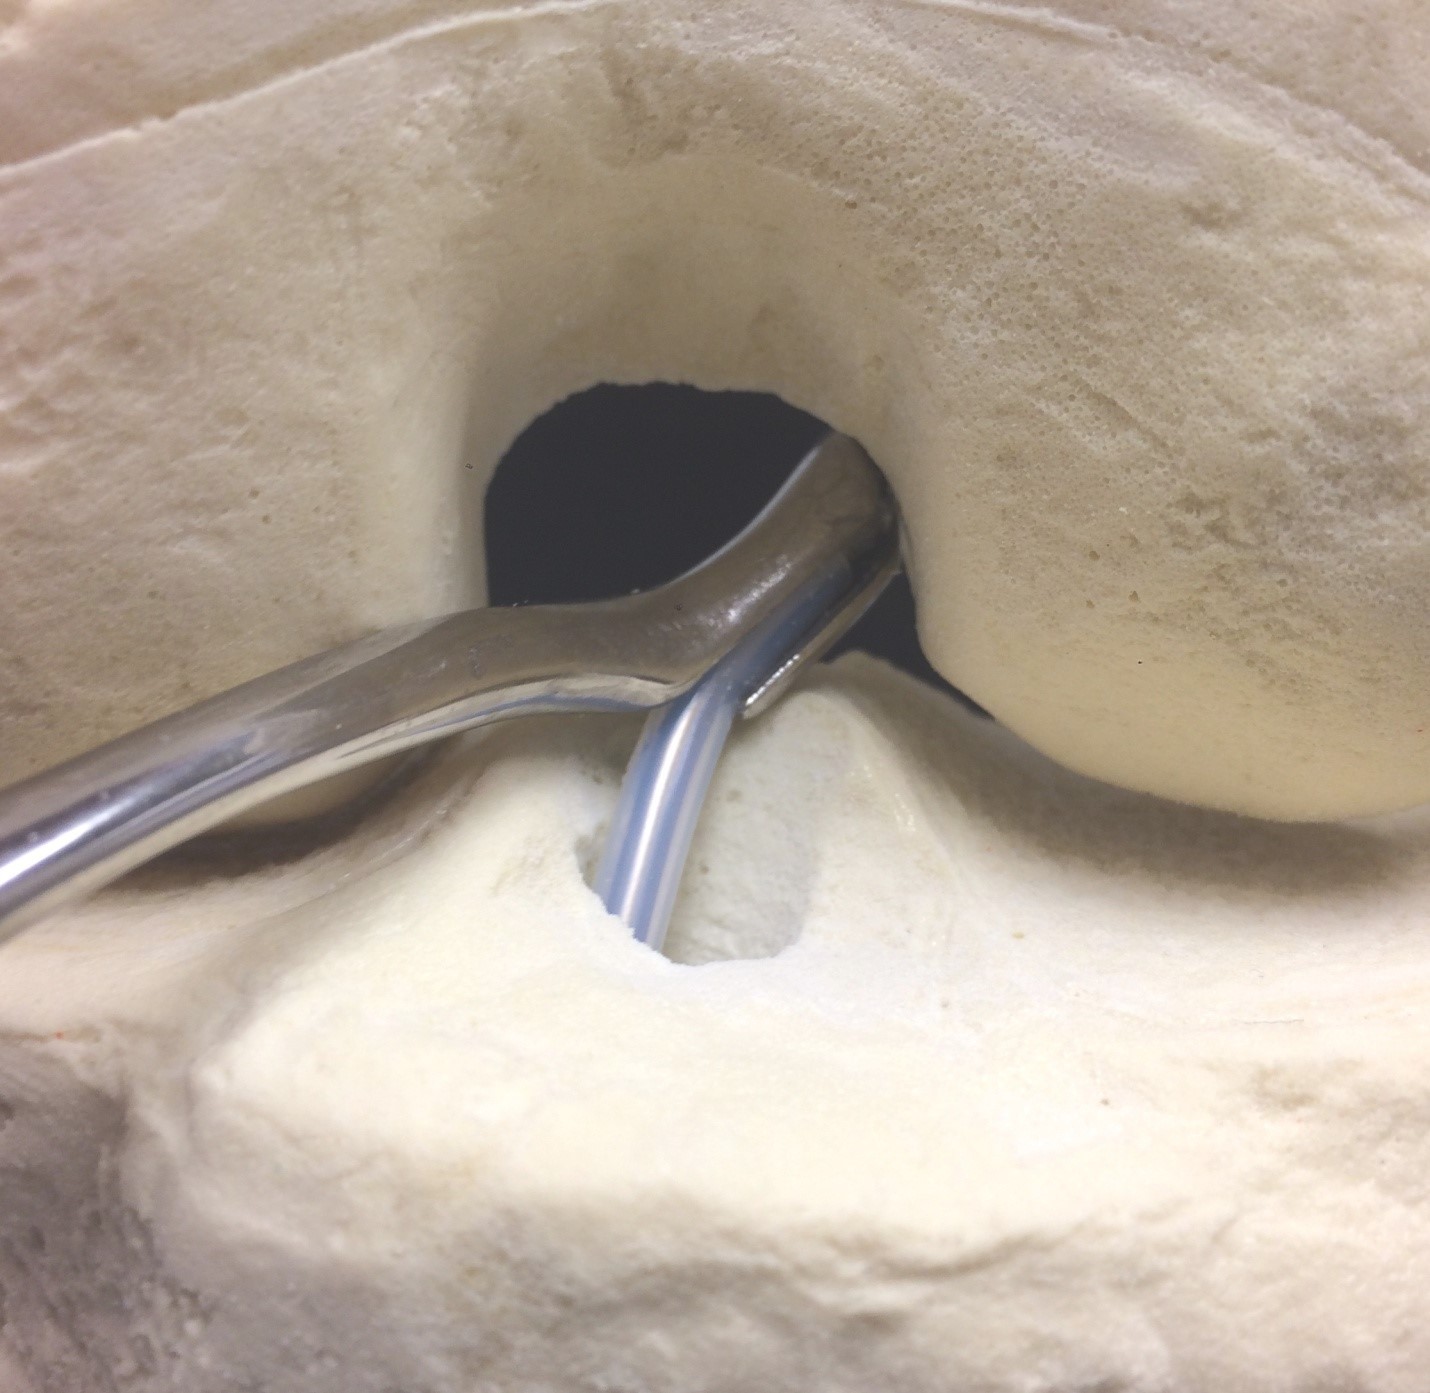
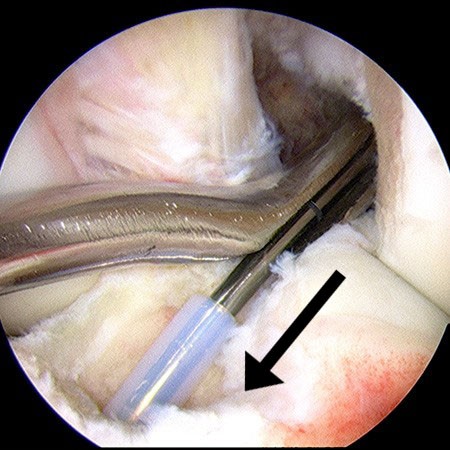
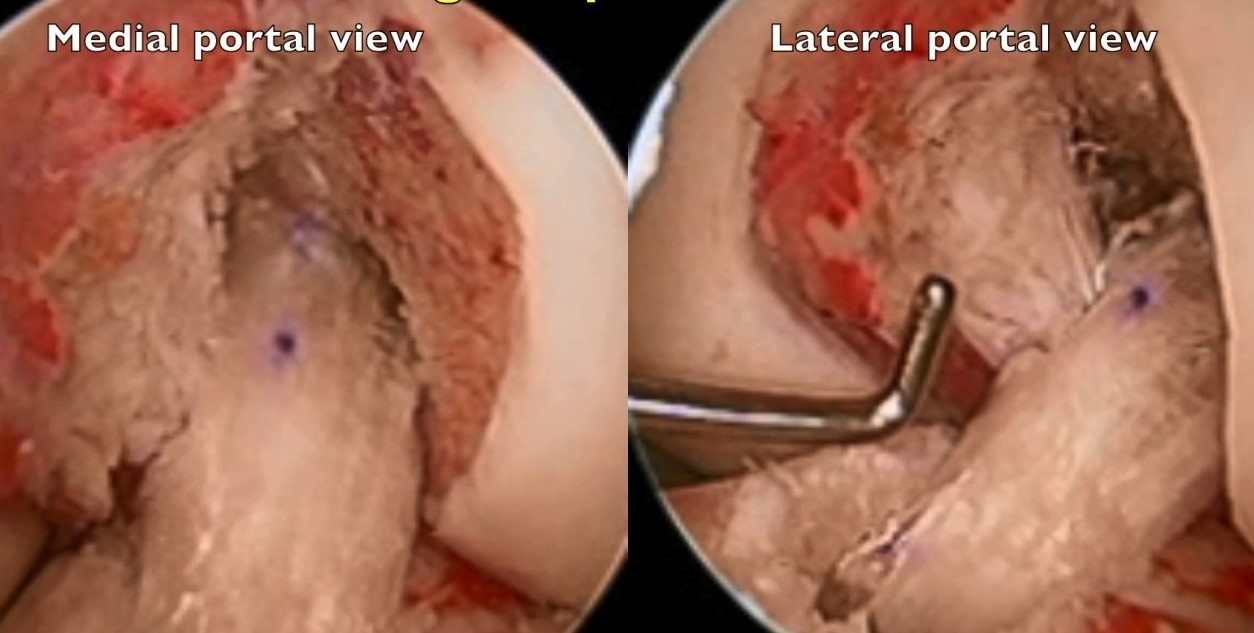
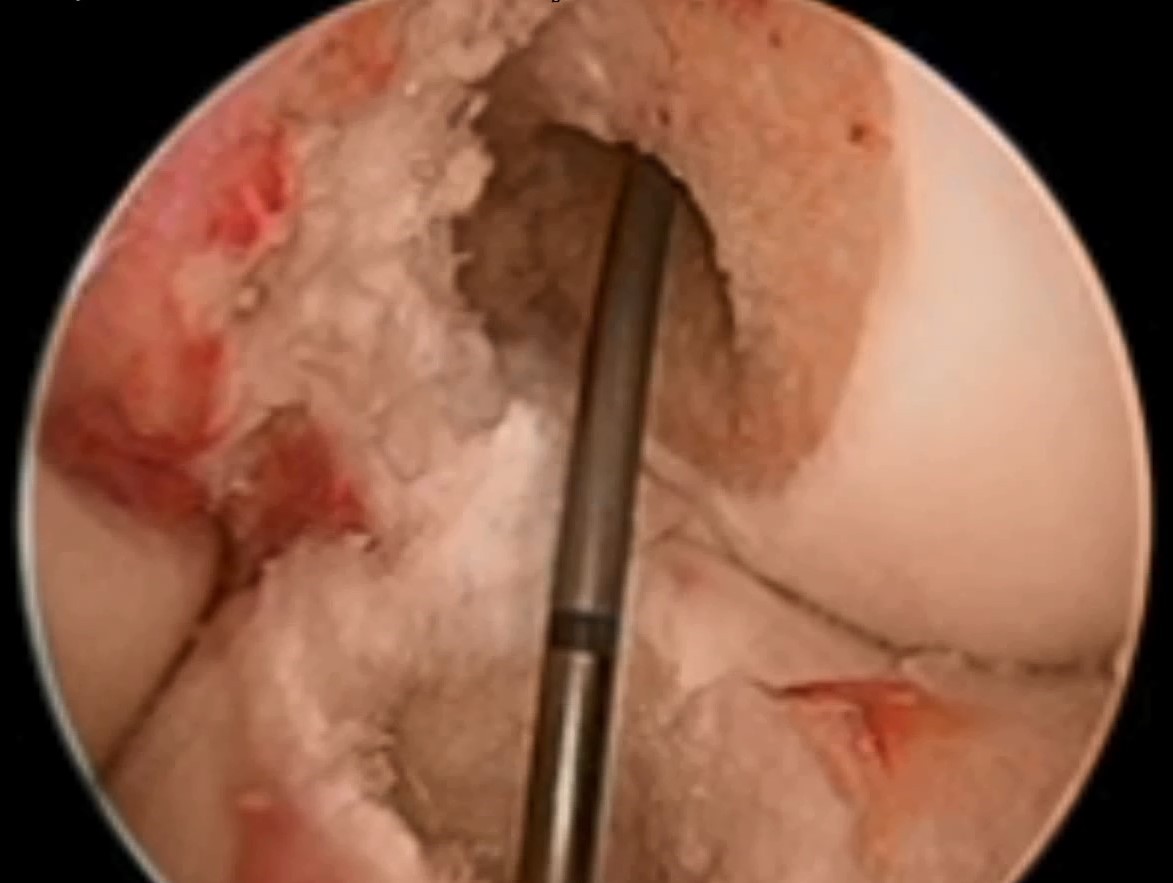 Tunnel position, viewed from medial portal.
-
- After reaming is completed, remove the reamer by withdrawing proximally off the guide wire. Note that the guide wire closely follows the positioning and angulation of the native ACL between tibia and femur.
7. Complete the reconstruction.
-
The BTB or soft tissue graft is then passed through the tibial and femoral tunnels, identical to the conventional transtibial technique. Tibial and femoral graft fixation is also identical.

-
Final graft position is anatomic.
Additional Technique Information
- Detailed Technique Guide (downloadable document)
- Hybrid Transtibial ACL Reconstruction: Advantages and Surgical Technique (video)
- Surgical Technique (Video)
- Hybrid Transtibial Revision of Primary Transtibial Femoral Tunnel (video)
- Technical Pearls
Click on the links below for more information: